Playing videos is a pretty common requirement in a lot of apps. Maybe you need to play a video in an onboarding screen or display some video content created by users.
The video_player package lets us easily play videos from our local assets, network, and photo library. And with the chewie package, we’re able to easily implement a customizable video playback UI that includes a whole host of additional features.
Project Setup
In our pubspec.yaml, add the video_player and chewie packages.
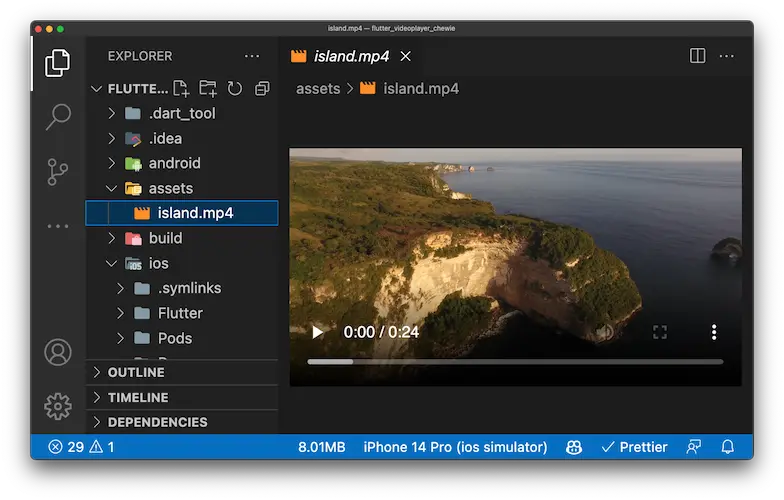
I’ve already added a video called island.mp4 to my assets/ folder for testing, so I’ll include the assets directory. You should download and add a video too for testing.
# pubspec.yaml

dependencies:
  chewie: ^1.3.6 # or <latest_version>
  video_player: ^2.5.1 # or <latest_version>

flutter:
  uses-material-design: true

  assets:
    - assets/
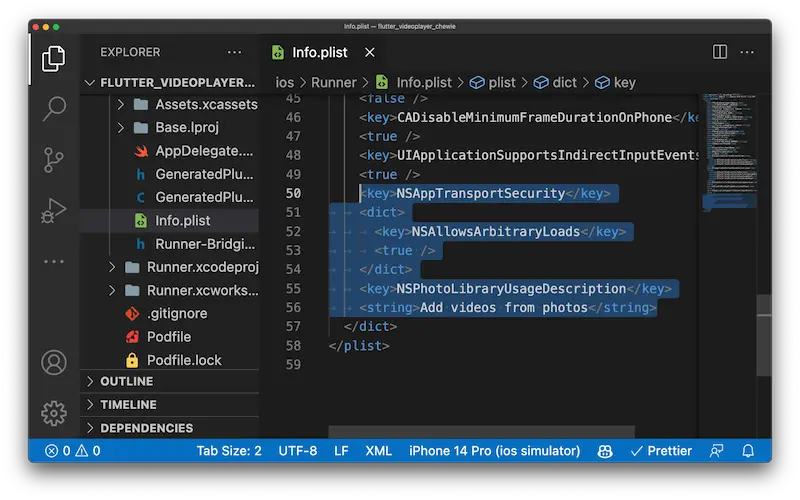
For fetching videos from a network on iOS, we have to add NSAppTransportSecurity and NSAllowsArbitraryLoads to our Info.plist. Note that you may need to add more permissions based on your use case.

For Android, add internet permission to the main/AndroidManifest.xml.
<uses-permission android:name="android.permission.INTERNET" />VideoPlayerView
We want to create a reusable widget called VideoPlayerView that handles loading videos from a network, local assets, and our photo library. This means we need to know the URL or path of the video and which DataSourceType we’re fetching from.
We have two state variables _videoPlayerController and _chewieController.
In initState, assign videoPlayerController based on the DataSourceType. contentUri is Android only. We’ll include it here anyway to avoid errors.
Then set the value of _chewieController passing in the videoPlayerController and aspectRatio of 16 by 9.
Chewie has an abundance of customizations you can see by taking a look at all the different parameters and what they do. We’ll use the default values for now.
Remember to dispose of both the video player controller and chewie controller to avoid memory leaks.
The build method returns a Column with the DataSourceType as a Text widget and Chewie wrapped in AspectRatio to control the size.
class VideoPlayerView extends StatefulWidget {
  const VideoPlayerView({
    super.key,
    required this.url,
    required this.dataSourceType,
  });

  final String url;

  final DataSourceType dataSourceType;

  @override
  State<VideoPlayerView> createState() => _VideoPlayerViewState();
}

class _VideoPlayerViewState extends State<VideoPlayerView> {
  late VideoPlayerController _videoPlayerController;

  late ChewieController _chewieController;

  @override
  void initState() {
    super.initState();

    switch (widget.dataSourceType) {
      case DataSourceType.asset:
        _videoPlayerController = VideoPlayerController.asset(widget.url);
        break;
      case DataSourceType.network:
        _videoPlayerController = VideoPlayerController.network(widget.url);
        break;
      case DataSourceType.file:
        _videoPlayerController = VideoPlayerController.file(File(widget.url));
        break;
      case DataSourceType.contentUri:
        _videoPlayerController =
            VideoPlayerController.contentUri(Uri.parse(widget.url));
        break;
    }

    _videoPlayerController.initialize().then(
          (_) => setState(
            () => _chewieController = ChewieController(
              videoPlayerController: _videoPlayerController,
              aspectRatio: 16 / 9,
            ),
          ),
        );
  }

  @override
  void dispose() {
    _videoPlayerController.dispose();
    _chewieController.dispose();
    super.dispose();
  }

  @override
  Widget build(BuildContext context) {
    return Column(
      crossAxisAlignment: CrossAxisAlignment.start,
      children: [
        Text(
          widget.dataSourceType.name.toUpperCase(),
          style: const TextStyle(fontSize: 24, fontWeight: FontWeight.bold),
        ),
        const Divider(),
        AspectRatio(
          aspectRatio: 16 / 9,
          child: Chewie(controller: _chewieController),
        ),
      ],
    );
  }
}
Play video from local assets and network
Let’s add an asset VideoPlayerView and a network VideoPlayerView to our VideoPlayersScreen. If you run into any issues, be sure to test on a physical device as simulators and emulators are not always accurate. It’s working great, and we even have a nice playback UI thanks to Chewie.
class VideoPlayersScreen extends StatelessWidget {
  const VideoPlayersScreen({Key? key}) : super(key: key);

  @override
  Widget build(BuildContext context) {
    return Scaffold(
      appBar: AppBar(title: const Text('Video Players')),
      body: ListView(
        padding: const EdgeInsets.all(20),
        children: const [
          // Local Assets
          VideoPlayerView(
            url: 'assets/island.mp4',
            dataSourceType: DataSourceType.asset,
          ),
          SizedBox(height: 24),
          // Network
          VideoPlayerView(
            url:
                'https://commondatastorage.googleapis.com/gtv-videos-bucket/sample/Sintel.mp4',
            dataSourceType: DataSourceType.network,
          ),
        ],
      ),
    );
  }
}
Play video from files
For selecting a video from a user’s photo library, we need to use the image_picker package. Add image_picker to the pubspec.yaml.
# pubspec.yaml

dependencies:
  image_picker: ^0.8.6+1 # or <latest_version>
iOS requires a tiny bit of permission setup. In our Info.plist, add the NSPhotoLibraryUsageDescription key with a String value explaining why access is needed. Android doesn’t require any setup.
SelectVideo is a StatefulWidget with a nullable File state variable. If file is not null, then display the VideoPlayerView with the file path and DataSourceType of file. The TextButton uses ImagePicker to select a video file and then updates the state accordingly.
class SelectVideo extends StatefulWidget {
  const SelectVideo({super.key});

  @override
  State<SelectVideo> createState() => _SelectVideoState();
}

class _SelectVideoState extends State<SelectVideo> {
  File? _file;

  @override
  Widget build(BuildContext context) {
    return Column(
      children: [
        TextButton(
          onPressed: () async {
            final file =
                await ImagePicker().pickVideo(source: ImageSource.gallery);
            if (file != null) {
              setState(() => _file = File(file.path));
            }
          },
          child: const Text('Select Video'),
        ),
        if (_file != null)
          VideoPlayerView(
            url: _file!.path,
            dataSourceType: DataSourceType.file,
          ),
      ],
    );
  }
}
Let’s add the SelectVideo button for selecting videos.
class VideoPlayersScreen extends StatelessWidget {
  const VideoPlayersScreen({Key? key}) : super(key: key);

  @override
  Widget build(BuildContext context) {
    return Scaffold(
          // ...
          VideoPlayerView(
            url:
                'https://commondatastorage.googleapis.com/gtv-videos-bucket/sample/Sintel.mp4',
            dataSourceType: DataSourceType.network,
          ),
          SizedBox(height: 24),
          SelectVideo(),
        ],
      ),
    );
  }
}
Dynamic Aspect Ratio
Our videos don’t all have 16 by 9 aspect ratios. To change the aspect ratio to the size of the video, it’s not as simple as only setting aspectRatio to _chewieController.aspectRatio or _videoPlayerController.value.aspectRatio. This is because the aspect ratio returned by the controller isn’t set until the video loads. We have to rebuild our VideoPlayerView widget once the VideoPlayerController loads.
So instead of using ChewieController’s autoInitialize, we need to manually initialize the videoPlayerController and call setState() to rebuild the widget. Then make sure the videoPlayerController is initialized before displaying the Chewie, otherwise we get a late initialization error. Change the aspect ratio to the video player’s aspect ratio.
class _VideoPlayerViewState extends State<VideoPlayerView> {
  late VideoPlayerController _videoPlayerController;

  late ChewieController _chewieController;

  @override
  void initState() {
    super.initState();

    // ...

    _videoPlayerController.initialize().then(
          (_) => setState(
            () => _chewieController = ChewieController(
              videoPlayerController: _videoPlayerController,
              aspectRatio: _videoPlayerController.value.aspectRatio,
            ),
          ),
        );
  }

  // ...

  @override
  Widget build(BuildContext context) {
    return Column(
      crossAxisAlignment: CrossAxisAlignment.start,
      children: [
        // ...
        const Divider(),
        _videoPlayerController.value.isInitialized
            ? AspectRatio(
                aspectRatio: _videoPlayerController.value.aspectRatio,
                child: Chewie(controller: _chewieController),
              )
            : const SizedBox.shrink(),
      ],
    );
  }
}
Wrap Up
Now if we reload the app and take a look at all of our videos, we can see the aspect ratios are dynamic!
We’ve successfully implemented the video_player and chewie packages into our app. We can play videos with dynamic aspect ratio support from our local assets, network, and files.
